
gamecart.gg address. With a custom domain, buyers reach it at a hostname you own, such as store.example.com. Gamecart takes care of routing and HTTPS once the DNS records are in place.
You need the Pro plan and access to your domain’s DNS settings.
Add the domain in the dashboard
- Open Settings > Domain.
- Turn on Custom domain.
- Enter the hostname, such as
store.example.com. Leave outhttps://, paths, and trailing slashes. - Click Save.
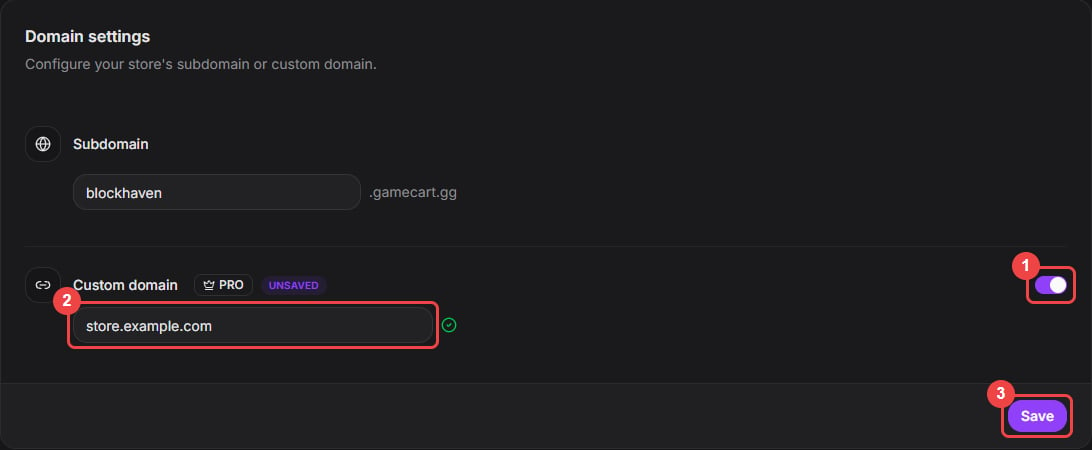
Turn on the custom domain, enter the hostname, and save.
Create the DNS records
After you save, the dashboard shows two records. Create both at your DNS provider, copying the values with the copy buttons.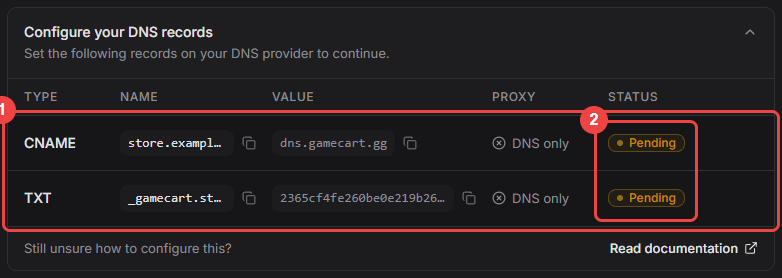
Copy both records exactly as the dashboard shows them.
example.com, your DNS provider must support CNAME flattening or an ALIAS record. If it doesn’t, use a subdomain such as store.example.com.
Wait for activation
The dashboard checks the records every 15 seconds while the page is open, and Gamecart keeps checking in the background. The Status column turns Confirmed for each record as it is found.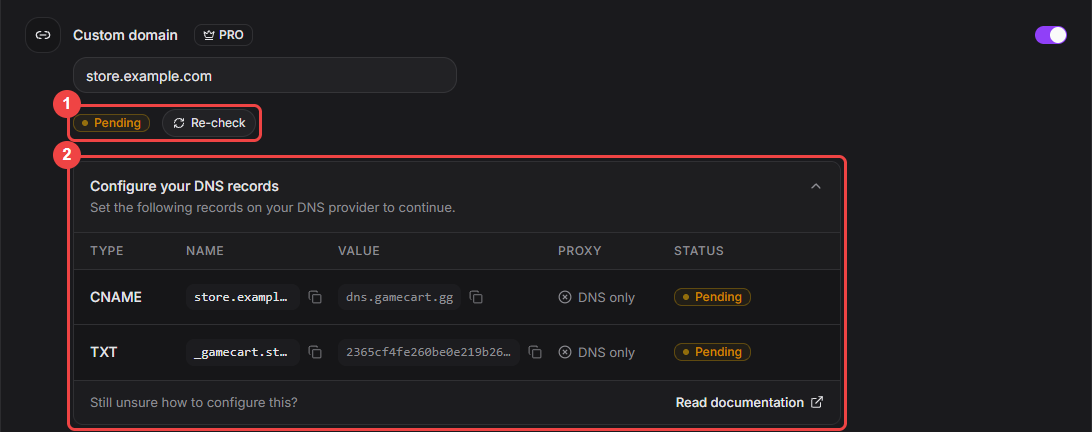
While the domain is pending, the records stay on screen with their status.
DNS changes can take a while to spread. Click Re-check to check again without waiting.
If the domain doesn’t activate
- Look up the saved records and make sure the provider didn’t add your domain twice, as in
_gamecart.store.example.com.example.com. - Set both records to DNS only if your provider proxies traffic.
- Remove old
A,AAAA, orCNAMErecords on the same hostname. - For a bare domain, confirm the provider supports CNAME flattening or ALIAS records.
Remove the domain
Turn off Custom domain and click Save, then confirm with Remove domain. The storefront stays available at itsgamecart.gg address. To use the domain again later, you add it and create the records again.